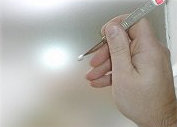
| |
 |
|
| |
| As
with most other websites, the search facility
etc on this site uses Javascript. If you have
any problems navigating, please use our SITE
MAP to search
the website. |
|
|
| |
 |
|
|
 
 |
|
|
|
Frosted
& etched-glass
effect window vinyl films
(With 'Cut-out' Sections)
|
Firstly
ensure that the glass is clean, (free from dust,
wax, grease etc.), and try to avoid working
in extremely hot or cold temperatures. If large
vinyl films are to be fitted, it may help if
two people work together. It's also best, before
handling the vinyl, to make sure your hands
are perfectly clean.
Although the vinyl can be fitted dry,
we strongly recommend that you use the 'wet
application' method, as the water helps
to make repositioning easier, as well as reducing
the risk of air bubbles etc.

|
 |
Wet
application:
Thoroughly wet the glass with water, either using
a spray-bottle or sponge/non-fluffy cloth etc. (a
very slight amount of mild washing-up
liquid can be added if required, though it's not
normally essential.)
|
Carefully
remove the frosted/etched-glass vinyl by lifting
up from the 'silicon release paper backing', avoiding
finger marks on the vinyl itself. Larger sheets
may need two people to work together. One to hold
the sheet by two corners, and the other to carefully
peel back the white, glossy silicon backing paper.
When it's nearly all removed the second person should
then take hold of the remaining two corners of the
sheet. It can now be taken over to the window, keeping
it taut as you go, and avoiding fabrics, clothing
etc., otherwise dust and fluff can be attracted
to the static of the vinyl.
(Note: If any parts of the cut-out sections refuse
to lift, simply place the whole sheet (still on
its backing) on a firm surface and rub over the
'application tape' sections with your finger nail
to press the section back against the silicon paper.
Also see the 'Problem
solving' section for further details.) |
 |
 |
Tack
the sheet gently on the glass and slide/move
it into position, using a tape measure at this
point if required. If it needs repositioning,
quickly pull it off and try again.
(If you find it easier, or if working on your
own, you can always place the top section of the
partly unrolled vinyl onto the glass, then
carefully remove the remaining silicon backing
paper, avoiding creasing, whilst holding the vinyl
firmly against the glass.)
|
|
Once
you are happy with the positioning, give the whole
vinyl surface another quick spray/moistening of
water. Now you can start to flatten it to the
surface using a plastic squeegee, (normally
supplied free with the order), or a soft cloth.
It may help if you hold the vinyl slightly
away from the surface as you proceed. Working
from the centre outwards firmly, but carefully,
press down the vinyl, pushing the water/air out
towards the edges. Try to avoid letting the vinyl
slide about as you are working otherwise it may
crease.
Note: The squeegee is normally used on its
own, though you can also wrap a smooth cloth around
it if required.
|
 |
 |
Once
the vinyl is fitted, the application tape can now
be carefully removed by peeling away from
the glass/vinyl at 180 degrees, (flat on itself.)
Note: You may need to wait for quite a while,
to allow it to dry more, before removing the application
tape. (It is impossible to give a precise timescale
as no two situations are the same. Cold temperatures,
inticacy of the design, and even the brand /concentration
of any added washing-up liquid can all have an affect
on the drying-time. It's best if you can check every
so often to see if the application tape can be carefully
removed. If the vinyl has not yet adhered to the
glass, then it may need to be left longer.) |
| Carefully
trim
off any excess vinyl with a craft-knife or scalpel
etc. (Scoring down the sides of the window frames.)
Then re-flatten any areas if needed. |
 |
 |
Once
fitted, check for any water/air bubbles. If they
won't push out, use a pin or scalpel blade to carefully
pop them, then squeeze out the water/air with the
back of your finger-nail. (Note: It's always best
to prick one edge of the bubble, rather than the
centre. You can then push the water/air out towards
the pinhole.) |
The
newly fitted vinyl now needs to be left untouched
for quite a while to allow it to dry thoroughly.
Job done! |
 |
|
Please
do not wash windows for at least one week.
(Thereafter,
a normal window cleaning routine can be done,
using mild soapy water rather than polish on the
actual vinyl sections, but care must always be
taken, especially with dusters, where any vinyl
edges are exposed.)
|
|
Notes
on removal of old self-adhesive vinyl:
Use
an electric heat gun or hot hair dryer to gently
warm the vinyl to be removed, taking care not
to overheat any glass or painted surfaces etc.
Carefully lift one corner of the vinyl,
using a blade or window-scraper etc., and peel
away the vinyl. Repeat on all required sections
until completely removed. Any slight glue residue
left behind can easily be removed using a 'Tar
and Glue Remover', (which is available from most
car accessory shops), or white spirit.
Important: Please
take care when using the extremely hot heat guns,
especially where glass, paintwork and other similar
surfaces are concerned. They are quite safe and
efficient to use, providing care is taken. Always
hold the heat gun 'well away' from the surface,
and your own hands, while you work. Just enough
warmth to allow the vinyl to be softened is all
that is necessary. Always handle heat guns with
care and keep them away from children. Also always
allow them time to cool down afterwards before
storing away.
|
These
instructions, as well as any others on this site,
are merely intended as a guide to fitting our
various products. Although we endeavour to be
as efficient as possible with our instructions,
and include as many details as we can, we cannot
be held responsible for any problems, damages
or indeed injuries, which might occur. As with
all DIY projects, the person or persons carrying
out the work is/are held responsible. ( Terms
and Conditions )
|
|
 |
 |
|


|